


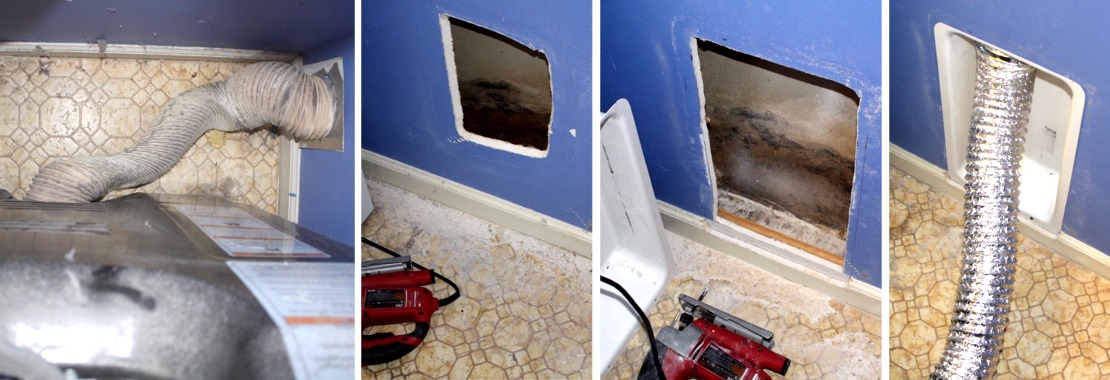
First image shows how we made more room in the laundry by moving the dryer back but unknowingly crushed the hose.
Second images shows our investigation hole. We did have to remove sound insulation. The top plate was accessible from the attic. This was a 2x4 wall and we did use the model 400.
Third image shows the final cut of the drywall. Look closely to see how I traced the outer edges of the Retro-Fit box and then by-hand, transferred an imaginary line about 7/8" in from that on the two sides and about 3/8" on the top. With the help of a neighbor we pushed the 4" galvanized pipe down from the attic by adding sections into the top plate and then into the retro-fit Dryerbox. With two people, this and the whole installation was very easy and went without incident. Probably less than 35 minutes total.
Last image shows the flex hose connected prior to moving the dryer back. The Dryerbox is not all the way down to the floor as my wall had a double bottom plate but it works fine. I like the product and my wife indicates the clothes dry faster.
Mike Nys