


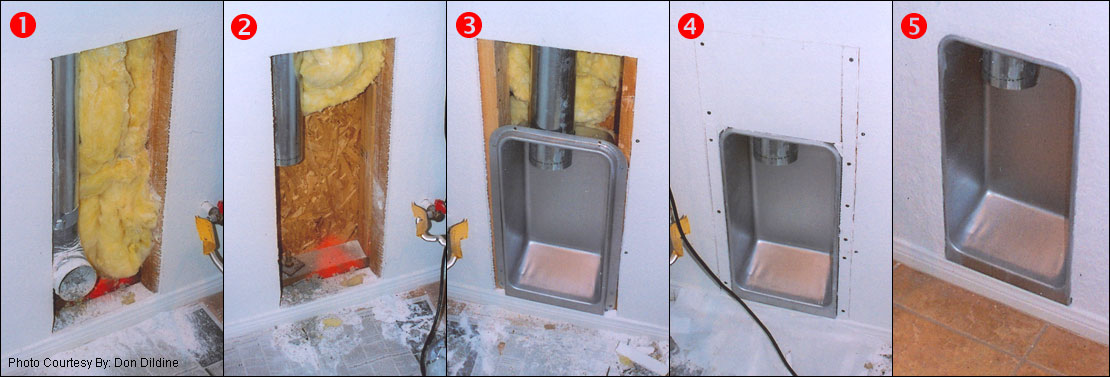
Thought you might like to see some sequential photos of installation I did at my new house. We had the exact same condition as your photos; crunched dryer hose due to duct connection point being too high and offset from our dryer outlet location by about 6". I was able to move location over 6" to align with my dryer.
I agree with one of your previous readers; cutting the existing exhaust duct was the biggest problem. Tried sheet metal sheers and then hack saw to no avail. Finally used a long, fine tooth blade in my Saws-all, pulling the duct outwards against the front of wall to brace during cut. That did a pretty good job. Just had to be careful to keep blade level during the cut. You can see that I cut an opening that gave me plenty of room vertically to allow getting the existing exhaust pipe thru the hole in top of the dryer box. Horizontally, I cut opening from stud to stud and later added additional stud framing for the drywall repair attachment. The drywall patch came out pretty good. Besides, it's behind the dryer, so nobody really sees it.
Don Dildine, ArchitectVice President
Director of Office Bldg. Division Production
Nadel Architects, Inc.
1990 S. Bundy Drive, Fourth Floor
Los Angeles, CA 90025
Phone: (310) 826-2100
Fax: (310) 826-0182
Web: www.nadelarc.com