| The Retro-Fit Box (Model 400) |
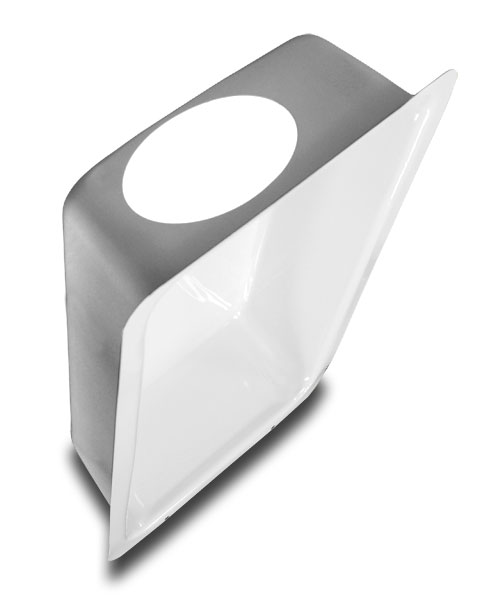
| The Dryer Vent Box for Existing Construction |
 |
 |
 |
| Customer Stories and Photos: It is always great
to hear from our customers. These stories are unsolicited and
not edited. They are provided to better educate you as the potential
installer. Ideas, steps, tools used and techniques are presented
in this fashion to possibly aid you in your particular situation.
Here is the place to show off some of your work! Send your photos to
of your most-recently completed installation.
Tell us about the installation you did, any tips and techniques,
and about how long it took to install. We want you to tell us
about the things you liked about the product, and also the things
you didn't! |
What I have learned
since the original install?
- When cutting the investigation hole
(to determine there are no obstructions) use a reciprocating
saw but hold the blade at an angle towards the center so
if you had to replace the piece you just cut out, it would
wedge back into place easily with a little drywall mud.
- Raise the Retro-Fit box about 1/4"
above the floor, this will give you some extra room to negotiate
the tuck-in operation later.
- The current design now has just 2 mounting
holes at bottom to hold the box against the wall. I've
found that the top of The Dryerbox is held very tight against
the wall by the penetrating 4" Snaplock pipe.
The bottom of the Retro-Fit box is best secured to the bottom
plate.
- For cutting the Snaplock pipe, these
two ideas may work:
- Use a reciprocating
saw with a long fine-toothed metal blade and cut right
through the pipe and probably the wall behind it which
you can repair easily later
- Use a Dremel Tool with a cutting
disk. Either cut around the Snaplock pipe exterior
or find a way to get inside it and cut from the interior.
- Wearing leather gloves, reach through the
top port and attempt to guide and coax the Snaplock pipe
through the port opening. Using small putty knives
and crimping the pipe in several places may assist with
getting it to penetrate the port.
- Cut the Snaplock pipe about 1 3/4"
from the top edge of the drywall cut. That will provide
sufficient penetrating length to attach the flex hose to
later and not be too long where it causes installation headaches
when tucking it up.
|

Rick Harpenau
Owner/President
In-O-Vate Technologies, Inc.
If you are able or willing to send us your pictures and installation
story, we will send you a check for $10 if it is used. Send
questions to:
|
 |
In-O-Vate Technologies Inc., 810 Saturn Street, Suite 21,
Jupiter, FL 33477
Phone Numbers: (561) 743-8696 / (888) 443-7937 (Toll Free)
Fax Numbers: (561) 745-9723 / 800) 308-9345 (Toll Free)
[
Home ] [ Specs
] [
Purchase ] |
|
 |
 |
|